Playbook Actions
Automate or create triggers for devices in your experience!
Written By Taylor Reed
Last updated 19 days ago
What is an “Action”?
Actions allow you to trigger Devices within your games without the need for pre-existing Game Control. Actions can be configured once you’ve added Devices to your Playbook game.
Actions can be triggered manually, but can also be set to trigger automatically once certain conditions have been met!
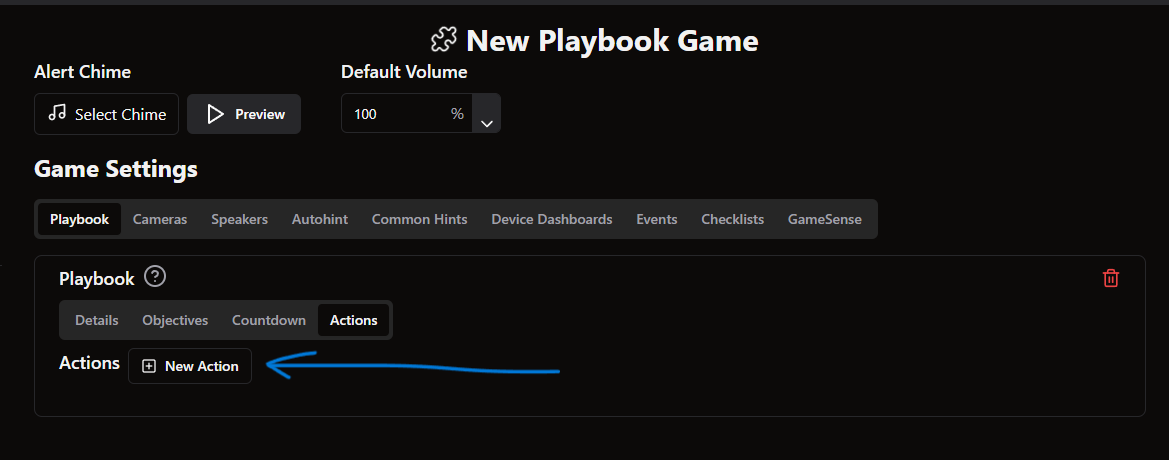
Create a new Action
Navigate to the “Actions” tab of the your Playbook’s settings and click “New Action”.
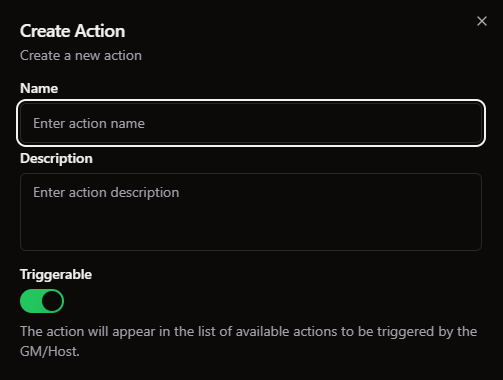
Enter the name and description for your new Action, then click Save.
If you want the Action to be visible to employees, make sure Triggerable is on
After saving, click on the Action you just created to open its settings. Here, you can set the Conditions and Executions for your new Action.
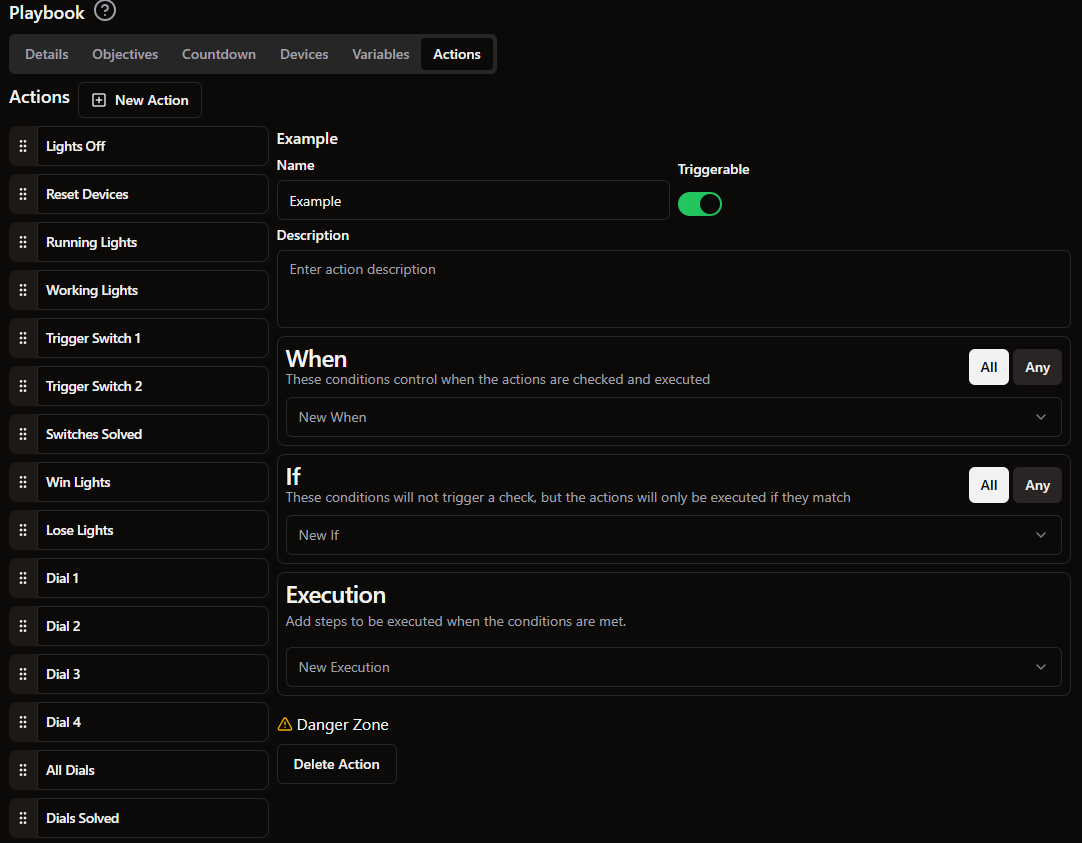
Conditions
Conditions are the input for Actions, criteria that must be met for the Action to be triggered. Conditions are necessary for automatically triggering Actions, but are not needed to create a manually-triggered Action.
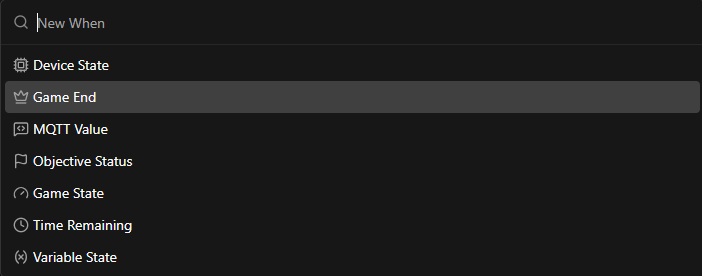
When - Triggers
Actions can be triggered by:
Device States - When a device is turned on or off
Game End - When the game is completed
MQTT Value - When specific MQTT Topic equals a certain value
Objective Status - When an Objective is set to certain statuses like complete/incomplete
Game States - When the game changes to Running, Idle, Resetting, etc
Time Remaining - When a certain duration is left on the timer
Variable - When a specific pre-set variable is set to a specific value
Multiple Conditions can be added to the same Action. Any/All determines whether all Conditions must be met before triggering, or if at just one is enough.
You can also add If conditions.
If - Conditions
If conditions are secondary conditions that must be met before the Action will proceed. This can be left empty if there is only one trigger condition.
Use If conditions when you have multiple requirements for an Action.
Example:
If you want a light to change only when the game is running and a specific puzzle is completed, you would use both conditions.
The When trigger would be a Device State change to On.
The If condition would be Game State = Running.
The When trigger causes the system to check to see if the If condition is met. So it would see the Device State change and then go check to see if the Game State = Running before triggering the Action. If done the other way, the Action would still work, but it would check to see if the Device State was on for the entire duration of the Game Running.
Executions
Executions are the output for Actions. Executions determine what happens as a result of Conditions being met (or a manual trigger by Gamemaster).
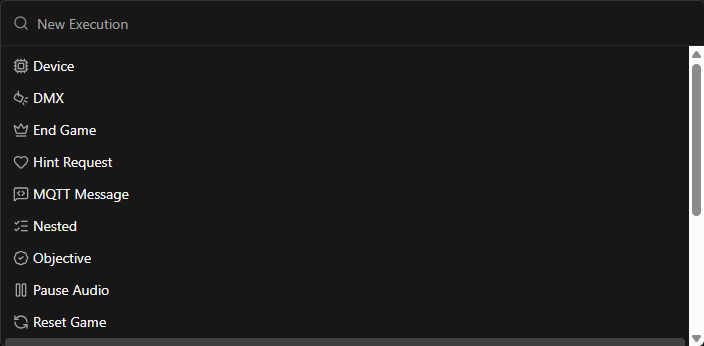
There are many types of executions:
Device - Select a device and change its status (usually on or off)
End Game - End the game as a win or loss
Hint Request - Set up your hint request action
MQTT Message - Send a MQTT Message for a MQTT client to receive
Nested - Allows you to trigger a different Action inside this Action
Objective - Select an objective and set it to complete, uncomplete, or toggle
Pause Audio - Pause whatever audio is currently playing
Reset Game - Puts the game in the Resetting State
Resume Audio - Continue playing whatever audio file was playing
Update Screen - Set a screen to a specified state
Send Hint - Sends a hint to the countdown screen (prewritten or custom)
SSH Command - Send a command to a specific machine to run it on that machine
Start Audio - Play a selected audio file
Set Variable - Allows you to manipulate variables within your game
Wait - Wait a certain number of seconds before continuing with the execution flow (often used to turn a device on, wait a few seconds, and then turn a device off)
Like Conditions, multiple Executions can be set for an Action. They will trigger IN ORDER from Top to Bottom according to the list you create.
Edit an Existing Action
Navigate to the “Actions” tab of the your Playbook’s settings and click on the Action you would like to edit. The selected Action’s details will appear on the right.
Make sure to click Save after making changes you would like to keep!
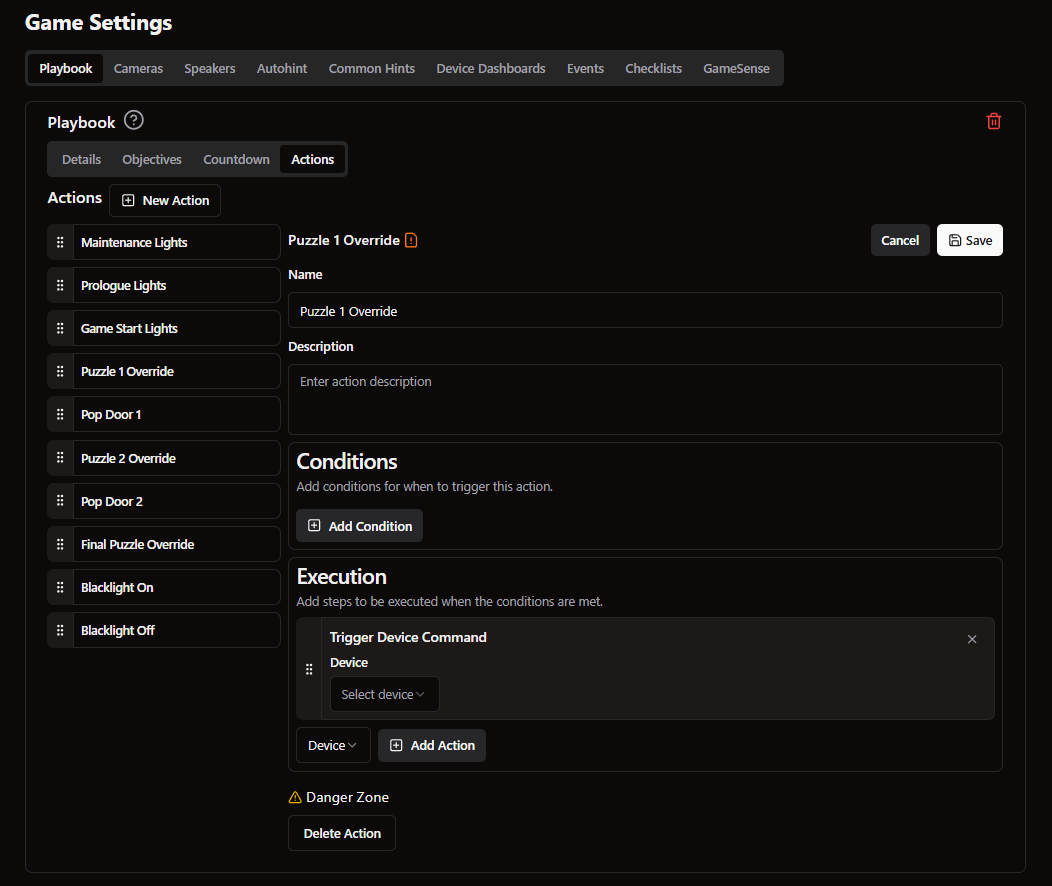
Delete an Action
Navigate to the “Actions” tab of your Playbook’s settings and click on the Action you would like to delete. Scroll to the bottom of the window—there you should see the “Delete Action” button beneath the Danger Zone warning.
After clicking the Delete button, Drawbridge may prompt you to login if you haven’t already. You will also need to confirm your decision in the pop-up window, or back out with the cancel button if you have made a mistake.